Tasty Tuesday: SC Butternut Squash Soup

butternut-squash-soup

It’s cold outside! And nothing warms you up better than a savory soup that cooks all day and makes your house smell amazing! Two secret ingredients ( a granny smith apple and coconut milk) give this recipe a one of a kind flavor,and it’s an easy recipe too!  Just toss your ingredients into your slow cooker and you’re good to go!

Recipe from Gimmesomeoven

Ingredients:

  • 2 cups vegetable stock
  • 2 cloves garlic, peeled and minced
  • 1 carrot, peeled and diced
  • 1 Granny Smith apple, cored and diced
  • 1 medium (uncooked) butternut squash, peeled, seeded and diced
  • 1 sprig fresh sage
  • 1 white onion, diced
  • 1/2 teaspoon salt, or more to taste
  • 1/4 teaspoon freshly-ground black pepper, or more to taste
  • 1/8 teaspoon cayenne, or more to taste
  • pinch of ground cinnamon and nutmeg
  • 1/2 cup canned (unsweetened) coconut milk
  • optional garnishes: extra coconut milk and a sprinkle of cayenne pepper (or smoked paprika)

Directions:

Add vegetable stock, garlic, carrot, apple, butternut squash, sage, onion, salt, pepper, cayenne, cinnamon and nutmeg to a large slow cooker.  Toss to combine.

Cook for 6-8 hours on low, or 3-4 hours on high, or until the squash is completely tender and mashes easily with a fork.  Remove and discard the sage.  Stir in the coconut milk.

Use an immersion blender to puree the soup until smooth.  (Or you can transfer the soup in two batches into a traditional blender, and puree until smooth, being very careful when working with the hot liquid.)  Taste, and season with additional salt, pepper, coconut milk, and cayenne if needed.

Serve warm, with optional garnishes if desired.

*A medium-sized butternut squash should weigh around 2 lbs or so, or about 2 1/2 cups, (so you would need about 32 ounces if buying pre-cut butternut squash).

Tasty Tuesday: Caramel Sauce

caramel-sauce

There’s just something about autumn that demands we eat apples with caramel. It’s a fun treat to share with family, friends, and neighbors, and caramel can be used in so many ways! Use it to drizzle over fruit, pancakes, other desserts, or mix it with your protein or shakeology shake!

I found two caramel sauce recipes and I just couldn’t decide which one I liked better, so I’m sharing both with you! Each recipe is dairy, sugar, and gluten free. It’s a clean eating recipe that still gives you the traditional caramel flavor!

Coconut Caramel Sauce:

Ingredients

Directions

1. Place coconut sugar, coconut cream and salt in a small sauce  pan. Heat slowly while stirring to dissolve the coconut sugar.

2. Bring mixture to a simmer. Cook for 10-15 minutes. The sauce will thicken further as it cools.

Caramel Sauce Ice Cream Topping
3. To test, take the saucepan off the heat. Spread a little sauce on a saucer (or similar) and place in the freezer for a few minutes. If the caramel doesn’t thicken (enough), simmer the sauce for a little longer.

4. Stir vanilla extract into finished caramel sauce.

Notes
I used the soft, paste-like kind of palm sugar, that you’ll find in Asia. Granulated coconut sugar works as well, but will produce a darker caramel sauce.
  • 1 cup canned coconut milk (you can use either reduced fat or full fat – if you’re in the US you’ll want to use “premium” coconut milk that has as little ingredients as possible – ours just had coconut and water)
  • 3 tbsp maple syrup
  • 1 tsp vanilla extract
  • A pinch of salt
  1. Place all of your ingredients into a medium to large non-stick saucepan over a medium-high heat.
  2. Stir to combine all ingredients and bring caramel to the boil.
  3. Keep cooking your caramel until it thickens and darkens, stirring occasionally.
  4. Once your caramel has thickened, remove from the heat and allow to cool slightly before serving or storing in a clean container or jar.
  5. The caramel will stay fresh in the fridge for around a week, but it will harden once cooled. To warm your caramel for serving, simply put a couple of spoonfuls of the caramel into a small microwave safe dish and heat for ~10 seconds or heat on the stove.

Don’t forget to check out the recipe index on  my page to find more of my favorite clean eating foods!

Tasty Tuesday: SC Mango Chicken

mangochicken

I know it’s Wednesday, but I didn’t get around to posting a favorite healthy recipe yesterday, and I just couldn’t wait another week to share this one with you!

Not only are mangoes delicious, they have tons of health benefits too!

nutrition-tip-mango

This recipe only has a handful of ingredients and you can even make it into a freezer meal. Recipe from six sisters stuff

Slow Cooker Mango Chicken

slow-cooker-mango-chicken
Photo Via

Ingredients

  • 5 boneless, skinless chicken breasts (mine were frozen)
  • 1 can corn, drained
  • 1 can black beans, drained and rinsed
  • 3 cups mango salsa
    • TIP: You can buy premade mango salsa at the store either in the refrigerated section or canned in the aisle with other salsa varieties. Make sure to read labels for added ingredients  that aren’t clean. If you can’t find premade salsa, you can always make your own  using this recipe, just leave out the sugar and add a few more tomatoes to offset the taste)
  • Cumin to taste (1/2 to 1 tsp.)
  • Lemon Pepper to taste (1/2 to 1 tsp.)

Instructions

  1. Put chicken breasts in slow cooker.
  2. Mix all other ingredients in a separate bowl.
  3. Pour over chicken breasts and cook on high for 4-6 hours.
  4. Shred chicken with two forks in the crock pot and serve over rice.
  5. Garnish with cilantro, if desired.


Tasty Tuesday: Slow Cooker White Chili

whitechili

There’s a good chance it’s going to rain where I live this week, and with the rain will come cooling temperatures. And nothing tastes better than cup of warm chili on a cold day! I just finished up a FREE 5 Day Challenge group where we exchanged crock pot recipes. This is one crock-pot recipe that is always on my go-to list when I need dinner to take care of itself! And the best part is: this is also a freezer meal!

White Chicken Chili (recipe adapted from our best bites)13102657_886770518099549_407971253171144503_n

Ingredients:

  • 1 medium onion, chopped
  • 2 15 oz cans Great Northern Beans (drained and rinsed)
  • 3-4 boneless, skinless chicken breasts
  • 3-4 cloves garlic
  • 1 (3.5) oz green chilis
  • 1/2 tsp dried oregano
  • 1/2 tsp coriander
  • pepper to taste
  • 32 oz of low sodium chicken broth
  • 1 lime, juiced
  • 1/2 cup cilantro, chopped

Instructions:

Boil chicken breasts in water on stove top until done. Cube chicken, sIMG_6547
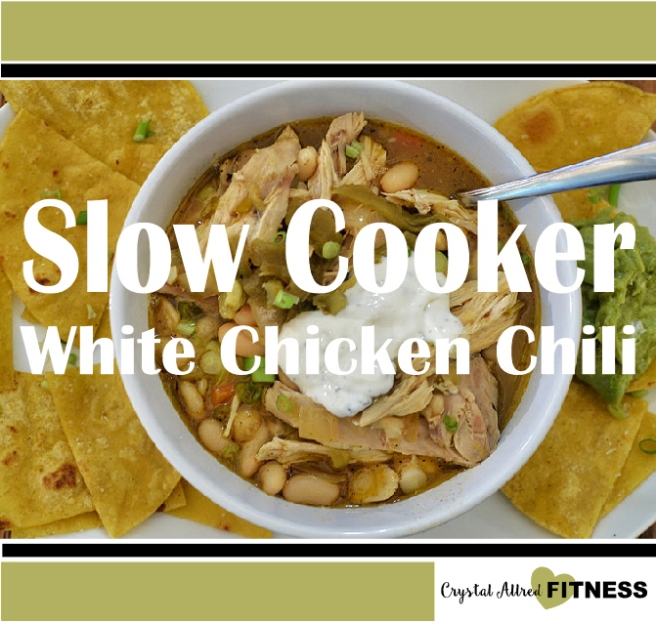
hred with fork, or use the paddle attachment of your mixer to shred chicken

Place chicken and all ingredients, EXCEPT: beans, lime juice, and cilantro into slow cooker. Mix well and let cook on high 5-6 hours or low 3-4 hours.

The last 30 minutes of cooking, add beans (drain and rinse them first), lime juice, and cilantro and cook until heated through.

Serve with shredded part skim mozzarella cheese, fresh limes, fresh cilantro, green onions, or avocados on top.

TO MAKE IT  SPICY: sub in canned jalapenos for the green chili.

TO FREEZE: After cooking the chicken, add ingredients to a freezer safe container EXCEPT: beans, lime juice, and cilantro. This will freeze for up to 3 months. When ready to eat, transfer to slow cooker and cook 7-9 hours on low or 4-5 hours on high. The last 30 minutes of cooking, add beans (drain and rinse them first), lime juice, and cilantro and cook until heated through.  Serve with desired toppings.


Tasty Tuesday: Homemade Applesauce

applesauce

When life gives you apples, make applesauce! It’s apple season, so take advantage of local You-Pick orchards, buy them fresh at a farmer’s market, or just find a good deal at the store! There’s just something about homemade applesauce….it tastes so much better than store bought and it’s better for you too! Store bought apple sauce has a lot of added sugar and preservatives. I love knowing exactly what my family is eating and that it’s healthy for them!

Apples are a great source of fiber and vitamin C. The flavonoids in apples reduce inflammation, regulate blood pressure, reduce excessive fat production in liver cells and lower your risk of heart disease. The soluble fiber in apples lowers your risk of heart disease by decreasing your bad cholesterol levels. Studies have shown the pectin in apples is a natural appetite suppressant, making them a great way to curb your appetite.

Applesauce makes a great healthy snack for kids and adults and it can be used as a substitute for oil in your baking recipes.

Applesauce is seriously so easy to make yourself and can for your family’s use throughout the year. You don’t need any fancy ingredients, tools, or special knowledge. Just follow these easy steps!

  1. Pick your apples. I like red apples for applesauce because they tend to be sweeter.img_7496 
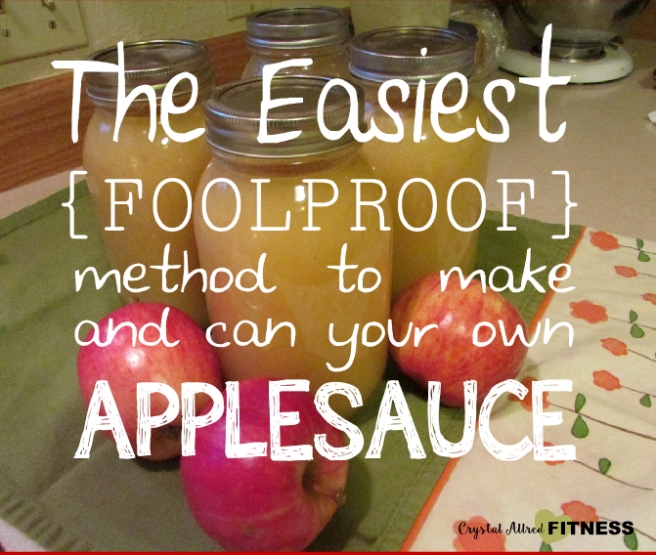
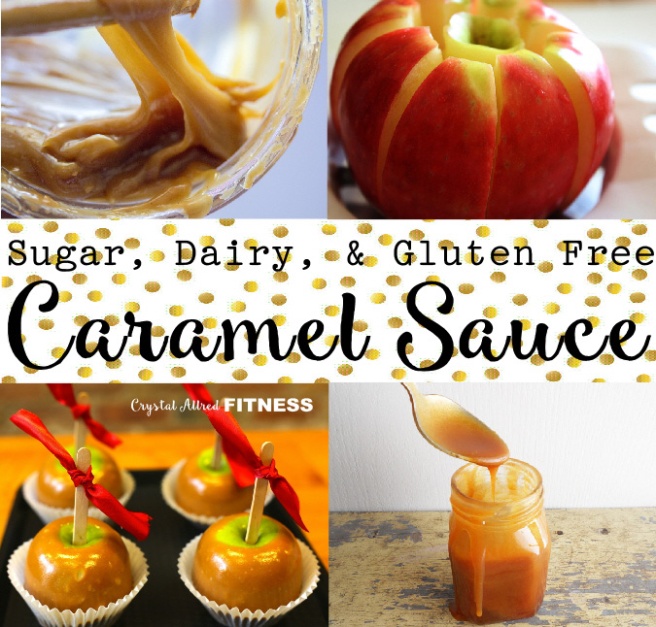
You can choose to either peel your apples or leave the skins on. Then just core your apples and cut them into chunks. Keep in mind about 6-8 medium apples will make 1 quart of applesauce.

2. Place apple chunks in a pot on the stove with about 1 cup of water per every 8 apples. Heat to boiling, stirring occasionally. Boil for 5-7 minutes.

img_7497

3. When apples are tender, remove pot from heat and use potato masher to mash apples to desired consistency. For a smoother applesauce, you can put the contents of your pot into the blender. If your applesauce is too thick, you can add water until you reach the right consistency. I try to get mine to be a little runnier than pudding. During this step, you can also  add your sugar or cinnamon. Personally, I don’t add anything to my applesauce. Homemade applesauce is already pretty sweet, and the sauce will continue to sweeten as it sits on the shelf. I’d rather add cinnamon or maybe a natural sweetener to individual servings if I feel like I need it later on.

4. Once your applesauce is at the consistency you want, pour sauce into clean, sterilized jars and put on the lids and rings.

5. In a large stock pot with a lid, bring water to a boil. Once boiling, add jars of applesauce.

img_7499

Make sure water covers the tops of your jars. Put the lid on your stockpot and process your jars in boiling water for 20 minutes. Remove jars from water to cool on the counter top. As jars cool, the lids should “pop” indicating they are sealed. Sometimes it can take several hours for the lids to pop. If you press down on the tops of your lids and it gives/ makes a popping sound, your jar is not sealed. You can try processing in boiling water again, or just put the jar in your fridge to use in the next few days.

And that’s it! Now you have homemade applesauce to enjoy throughout the year!

For my recipe for strawberry applesauce, click HERE!